It’s been my second time now to join Going Home to Roost‘s blog tour. This time, Bonnie has a new fabric collection called Winged, which I had the privilege again to be part of the bloggers who can make something out of her new fabric line.
Last time, I did a DIY fabric notebook without sewing because honestly, I don’t know how. But now, I want to give it a try. I always have this fear with sewing machines, not in a scary way, but the same feeling when trying something new. That’s why I wanna conquer that one this time.
So I’ve been eyeing on this artist roll case since I saw it in Vancouver but it’s quite expensive. I’ve thought, this might be a good chance to have that, plus I’ll get to learn how to sew. Now, the only problem was, I had no idea how. The embarrassing part… I have a family of seamstress. My lola and my papa used to sew for a living. Apparently, I didn’t get to learn how when they were still alive. Didn’t know how efficient and great that skill was.
The plan was to look for a friend who knows how and without a doubt, I’ve thought of Ruby of Thursday Craft Love who’s one of the photographers I admire and her crafts are just so beautiful. She was so kind and generous to offer her help and time. She also heartedly welcome me to her home. The funny thing was, I invited myself to her house since we don’t have any sewing materials in ours. {Ruby, I’m really grateful for spending the time in helping me with my DIY project} I’ve really thought of hand-sewing it if she wasn’t available to help me. Thank God, she was! Otherwise, I might go blind by this time.
Seriously, for a crafter who doesn’t know how to sew, I chose a pretty easy project. Lucky me, right? Ruby said, good thing there wasn’t any zippers, because that’s a bit tricky. Now let me show you how easy this is… Majority of the project was done by Ruby… but… I’m proud to say few stitches, as in like two edges were mine, haha.

 Materials for DIY Artist Roll Case
• Fabric cloth {from Winged Collection}
• Chinese cord
• Sewing machine
• Needle and thread
How to do it:
{1} First, measure and cut your cloth into 2 pieces of {Height: 12″ ; Width: 16″}. Try folding it according to the final look. Pockets for brushes is 6″ in height; Cover is 3″ in height.

{2} We will be sewing on the back part of the cloth, so place the patterns facing each other. Then put head pins on all sides to secure the cloth from being unaligned. This is just to combine the two cloth together. {3} Start sewing one edge until you’ll finish all four. But on the 4th side, leave a small opening for the handle {middle area, either left or right}.
 {4} Pull the cloth from inside out through the small opening with a use of a stick.
  {5} Start sewing all edges again. This will make the edges stiff as suggested by Ruby’s mom who’s also a great seamstress.
 {6} Measure the height of the pocket and put head pins on both sides and at the bottom. Then sew it.
{7} Now that you have your pockets, divide it into an inch wide giving you around 16 pockets.  {8} You need to make a guide by using a pencil or sewing chalk and ruler.
{9} Once you’re done with the guide, you can now sew it vertically. {10} You’re almost done! I didn’t wash the cloth yet, so after sewing, hand wash and iron it.
 {11} Place the chinese cord inside the small opening and hand stitch to enclose.
 There you go… just simple right?
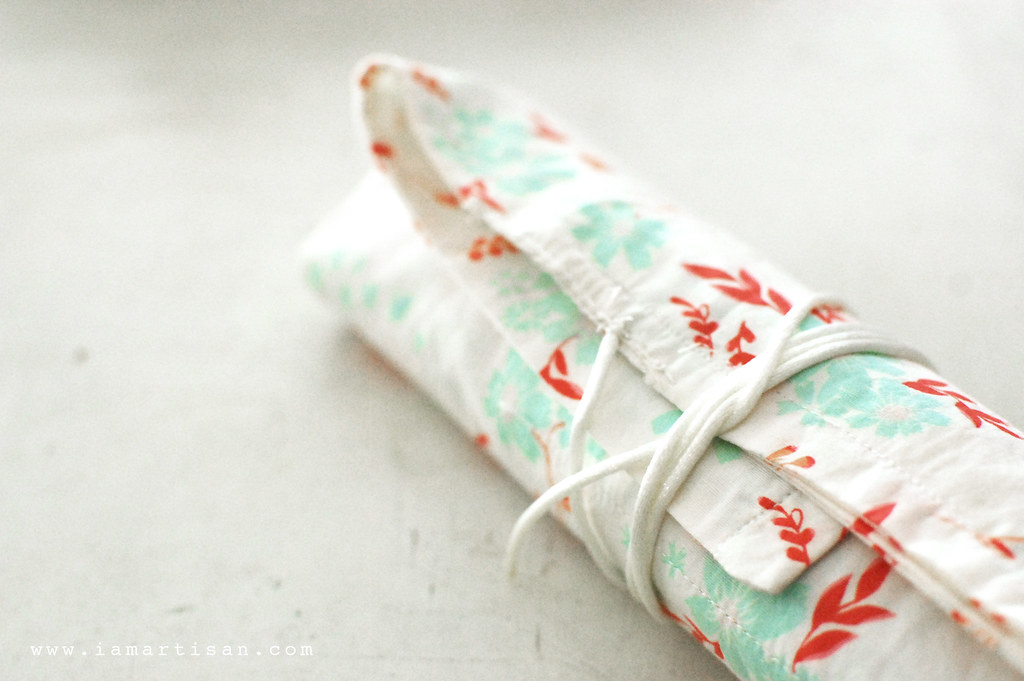
 It’s normally called artist brush case, but I’m calling it artist roll case because I’ll be putting various tools inside like calligraphy nib holders, pencils and markers.
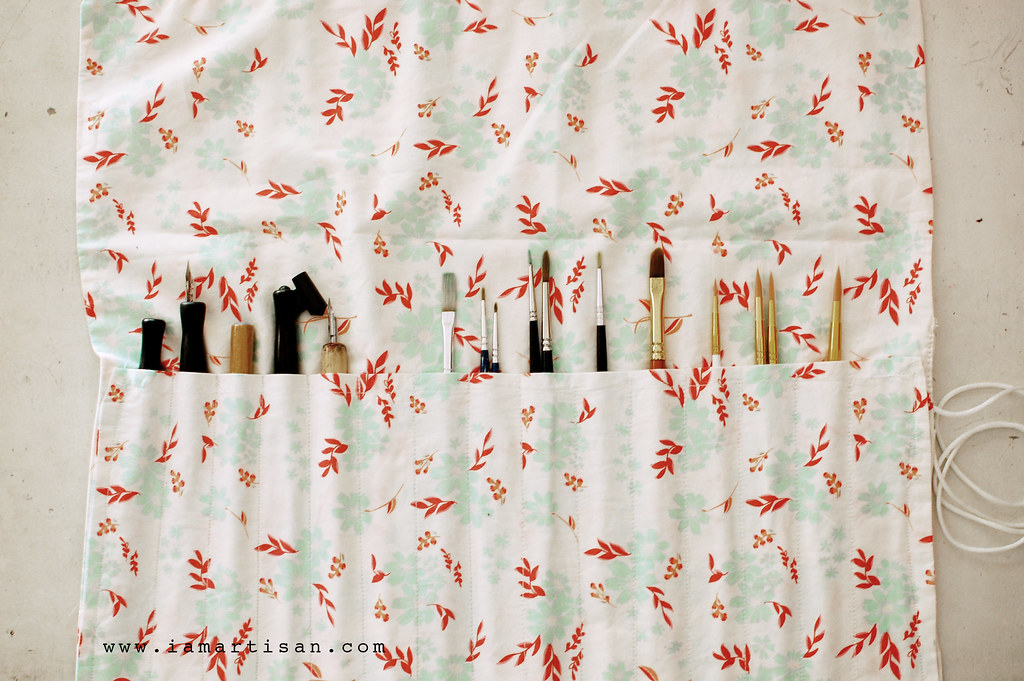 The height was also intensionally long in case you’ll need space for longer brushes like for oil or acrylic. The width per pockets are also made for at least 2 brushes inside or just good enough for calligraphy sets.
 I seriously enjoyed making this project. Aside from having my own handmade artist roll case, I also get to learn how to sew with the big help of Ruby, of course.
 If you have so many brushes or calligraphy set, this is really helpful to carry all your tools, so feel free to try this DIY. And if you enjoyed this project, try checking what Edith Minne did yesterday. And tomorrow you’ll also see Heather Andrus and Megan Jimenez what come up with their fabrics.
If you want more sewing projects, the winged blog tour will surely make you preoccupied for the next 31 days.

april – this is adorable! and so very useful. thank you for such a great tutorial!!