I don’t spend much time in the kitchen but there are times when I check our kitchen to look for certain items I see cluttered jars or containers that I can’t distinguish what exactly it is. Or perhaps, I just want to make an excuse to put labels on everything. Either way, it makes our life easier and it looks prettier to see all those labels, right.
Here’s a DIY for pantry labels to make those plain containers and bottles look more pleasing and organise of course. I made it black to look as if it’s a chalkboard.

Materials you’ll need:
Matte sticker paper
Scissors
Metallic Pen {Silver color}
Acetate Sticker
What to do:

{1} Download my pantry labels template here, and print it on a matte sticker paper. I suggest matte so the print will look crisp. I made the template blank with different shapes and sizes, for you to write on the item with a metallic pen.
 {2} After printing and writing the items on the labels, cover the matte sticker with the acetate sheet. This will prevent the matte sticker from blotting once wet.
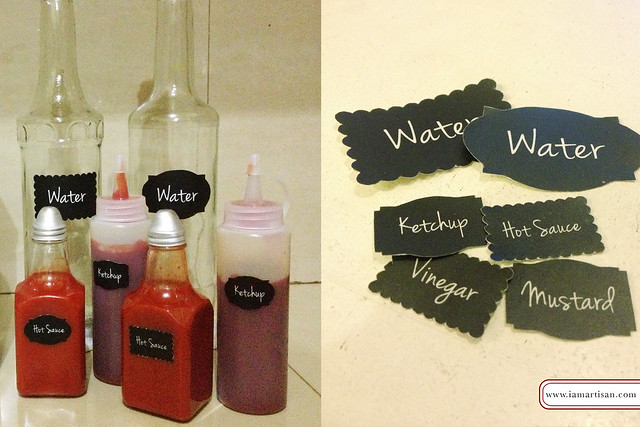 {3} Just follow the shape of the label for cutting. Then you can now stick them to your jars, bottles or containers.


You’ll see this labels in Yellow Hauz. The bigger labels were used for the trash bins and the smaller ones for the bottles and jars.
TIP: If you have old bottles, like ours was from the syrups to mix drinks, you can use it as water pitcher or vase for decorations.
I would love to know where you put these labels on. If it’s not too much to ask, do tag me on instagram: @iamartisan or on our facebook page.
