As I was cleaning my newly repainted room, I find my things unorganized and messy, as always. But if possible I wanted to keep my room free from all the clutter whether visible in the bookshelf or inside my closet.
Then I’ve thought of using old boxes to organized some of the items but I find it very industrial. Feels like my room is like a storage warehouse with all those labeled boxes. So once again, I DIY‘ed these boxes, add some doilies to make it pretty and now who would have thought, that that was an electric stove box inside my closet right?
Here are the materials you’ll need {no fancy pancy needed}:
• Old appliance box
• Manila or Craft paper
• Glue and Brush
• Doily Paper {big and small}
• Yarn and other embellshments
What to do:
{Step 1 and 2} Glue the upper flap of the box inside to its walls, to make the box sturdy. Also include glueing the base to its lower flap.
{Step 3 to 6} Now glue the outside part. Glue one side at a time then attached the Manila paper slowly to avoid getting it ripped. Then let it dry for awhile.
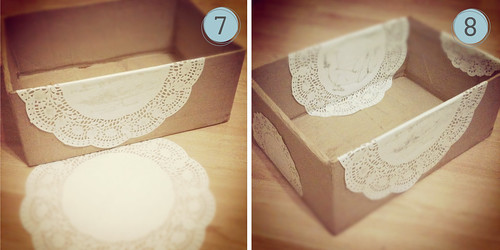
{Step 7 and 8} Once dry, add the big and small doily paper accordingly. Don’t over do-it as it may look too much. One doily on each side is good enough.
{Step 9 and 10} Wrapped it with brown yarn then add embellishments like tags and charms on one side of the box.
And there you go… your own box organizer! Easy-peasy and without buying any new materials, unless of course you run out of it, lol.
Oh how I love opening my closet now. Yes, I know, I’m just a little OC, but I can’t help it. And since honestly, I can’t afford to buy nice organizers then that means I have to do something about it and I just did… I hope you find this DIY Doily Box easy and practical, don’t limit yourself from adding different designs and embellishments. Happy DIY weekend friends.


Pretty, April! Now I know what to do with my larger doilies! Thanks for the idea!
Nice one April! What a sweet and romantic idea!